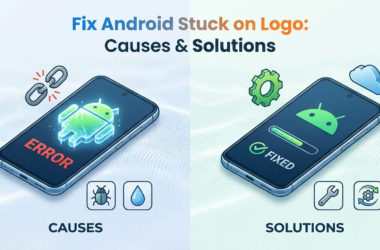


Understanding Stock Firmware: A Brief Overview
Stock firmware, often referred to as the default software that comes pre-installed on Android devices, is crucial for the basic functioning of your device. It is the official operating system designed by the manufacturer, which helps maintain the stability and security of the device. Understanding Android firmware is pivotal, especially when you plan to flash stock firmware, as it allows you to restore Android firmware to its original state in case of any issues, such as a bootloop or software glitches.
Many users opt to flash stock ROM to perform an Android firmware update or unbrick an Android phone that has become unresponsive due to software issues. Tools like QPST offer an official guide for those looking to flash ROM on Qualcomm-powered devices. Learning how to use specific firmware flashing tools and custom recovery for Android devices empowers users to upgrade an Android device efficiently.
For those encountering persistent boot issues, consulting guides like how to fix a phone stuck in a bootloop on ByteFixes can provide solutions. Additionally, for a comprehensive understanding, you can explore resources such as Android Authority’s detailed tutorials on flashing ROMs.
Why Flash Stock Firmware on Your Android Device?
Flashing stock firmware on an Android device can be a crucial step for several reasons. Primarily, it helps in restoring the original Android firmware that came with your device, ensuring optimal functionality and performance. If you’ve been experimenting with custom ROMs or rooting, you may have encountered issues like a bricked phone or persistent bugs. Flashing stock ROM can unbrick your Android phone and restore it to its factory state, which is particularly beneficial when facing software glitches.
Another significant advantage is the ability to perform an Android firmware update. Manufacturers release updates to improve security, add new features, and fix existing bugs. By flashing the latest stock firmware, you’re essentially upgrading your Android device to the latest iteration, ensuring both performance and security enhancements. This stock firmware guide also serves as a resource for those looking to switch back from custom recovery for Android or any other modding environments they might have engaged with.
Before you proceed with the flashing process, make sure you’re equipped with the right firmware flashing tools and knowledge. For a detailed insight into troubleshooting and solutions for devices stuck on boot, learn more about how to fix a phone stuck in a bootloop with our comprehensive guide. For official instructions and further insights, you might find resources available on platforms like XDA Developers helpful as well.

Essential Preparations Before Flashing Stock Firmware
Before diving into the flash stock firmware process on your Android device, it’s crucial to make the necessary preparations. This ensures a smooth procedure and helps avoid potential issues such as a bricked device.
- Backup Your Data: Flashing stock firmware will typically wipe the data on your device. Use cloud services or an external drive to back up your contacts, photos, and important files.
- Check Battery Level: Ensure your phone has at least 80% battery life to prevent any interruptions during the flashing process.
- Install Necessary Drivers: Download and install the right USB drivers for your Android device on your computer to enable successful communication between devices.
- Download Firmware: Obtain the correct and latest stock ROM from your device manufacturer’s website. Double-check the firmware version for compatibility.
- Enable USB Debugging: Go to Developer Options in your phone’s settings, and turn on USB Debugging to facilitate communication with your computer.
For more detailed guidance on overcoming common issues during the flashing process, explore our guide on fixing Android bootloop issues.
An in-depth understanding of these preparatory steps is often discussed in forums like XDA Developers, a trusted resource in the tech community.

How to Backup Your Android Device Successfully
Before you flash stock firmware on your Android device, it is crucial to back up your important data to prevent any loss. Performing a backup ensures that you can restore Android firmware easily if something goes wrong during the process. Here’s a step-by-step guide to help you back up your device effectively.
1. Use Google Backup
Google Backup is a convenient built-in option for all Android devices, allowing you to save app data, call history, and device settings. To enable this:
- Navigate to Settings > Accounts > Backup & Restore.
- Tap on Back up my data and toggle it on.
- Select Backup account to choose your Google account.
2. Backup Photos and Videos
Ensure photos and videos are backed up using Google Photos. Open the app, select Menu, then Settings, and enable Backup & sync. This secure cloud backup ensures you can retrieve all visual data after installing stock ROM or completing an Android firmware update.

3. Use Third-party Tools
If you’re looking for advanced backup options, consider using third-party tools. Apps like Titanium Backup (requires root) offer comprehensive solutions, allowing you to secure your data thoroughly. Explore these tools for a custom recovery for your Android needs.
Always use authorized methods for professional servicing; misuse of tools can lead to a need to unbrick Android phone if errors occur during the process. For detailed action, refer to our guide on resolving bootloop issues. For additional resources, you may find more comprehensive details on Android Central’s Backup Guide.
Necessary Tools and Software for Flashing Firmware
In this stock firmware guide, having the right tools and software is crucial for a successful Android firmware update. Flashing firmware enables you to upgrade your Android device, restore Android firmware, or even unbrick an Android phone. Let’s explore the essential tools you need to get started.
- Odin: For Samsung devices, Odin is an indispensable tool, as it assists in flashing official firmware on Samsung devices. Learn more about using Odin in our beginner’s guide to Odin.
- SP Flash Tool: For MediaTek devices, SP Flash Tool is widely used. This tool aids in writing custom recovery for Android and installing stock ROMs.
- QFIL: For Qualcomm devices, the QFIL (Qualcomm Flash Image Loader) tool is often utilized to flash firmware, with detailed instructions available on how to use QFIL effectively.
- ADB and Fastboot: These are critical components for modding and managing Android devices via command line. You can find more insights in tools like ADB Fastboot.
Ensure you also have the correct USB drivers installed on your computer to facilitate seamless communication between your PC and Android device during the flashing process. For professional or authorized servicing, these tools are essential in ensuring error-free operation. For more external insights, visit this guide by XDA Developers.
Step-by-Step Guide to Downloading the Correct Stock Firmware
Downloading the correct stock firmware is a crucial initial step in the process of flashing your Android device. An accurate firmware download ensures that your flashing process proceeds smoothly, helping you avoid potential issues like bricking your phone or encountering a boot loop.
Identify Your Device Model and Region
First, identify your Android device’s exact model number and the region it’s configured for. You can find this information in your device settings, under “About phone.” This detail is essential as using the wrong firmware may render your device unusable. For comprehensive guidance on resolving common Android boot issues, you can explore our bootloop fix guide.

Download From Trusted Sources
Visit your device manufacturer’s official website or other trusted sources to download the stock firmware. This ensures safety and authenticity, reducing the risk of installing corrupted or malicious software. Tools like the Android’s SDK can also help in managing firmware files effectively. Avoid unofficial sites to maintain your device’s integrity.
Validate the Firmware
After downloading, always verify the firmware file with checksum tools to confirm its integrity. This step safeguards against corrupted files that could potentially disrupt the firmware flashing process. It’s advisable to explore firmware flashing tools familiar to your device’s ecosystem for reliable solutions.
Downloading the correct stock firmware is a foundational step in this journey of Android customization. For professional servicing and resolution of more complex Android challenges, be sure to consult authorized service centers or experienced professionals.
How to Enable USB Debugging on Android Devices
Enabling USB Debugging is a crucial step when you want to flash stock firmware on your Android device. Whether you are looking to unbrick an Android phone or perform an Android firmware update, this feature allows communication between your Android and a computer.
Steps to Enable USB Debugging
- Navigate to Settings: Open the Settings app on your Android device. Scroll down and tap on “About Phone”.
- Access Developer Options: Find the “Build Number” and tap it seven times. A message will appear, indicating that Developer Mode is enabled.
- Enable USB Debugging: Go back to the main Settings menu. You will now see “Developer Options”. Open it and locate “USB Debugging”. Toggle it on and confirm any prompts that appear.
USB Debugging bridges your Android device with firmware flashing tools available on your computer, directly supporting processes such as upgrading your Android device or executing a flash ROM tutorial. For more complex troubleshooting, consult our guide on fixing Android boot loops if your device encounters issues post-update.
For further insights on handling smartphones, including using features like custom recovery for Android or Android stock recovery, refer to comprehensive guides from reputable sources like Android Authority. Keeping this feature enabled ensures a smoother experience when following any stock firmware guide or restore Android firmware projects.
Flashing Stock Firmware Using Fastboot: A Detailed Walkthrough
Flashing stock firmware using Fastboot is a reliable way to restore Android firmware or unbrick an Android phone. Whether you’re performing an Android firmware update or looking to install stock ROM, understanding Fastboot is essential. Fastboot is a protocol that enables users to modify the flash file system from a computer via a USB connection. Here’s a step-by-step guide to help you with this process.
- First, ensure that USB Debugging is enabled on your Android device. You can find this option under Developer Options. If Developer Options are hidden, navigate to Settings > About Phone and tap the Build Number seven times to reveal it.
- Next, download and install the necessary ADB and Fastboot tools. For a comprehensive guide on ADB and Fastboot, check out our related article on ADB and Fastboot essential tools.
- Boot your device into Fastboot mode. Typically, this involves holding the Power and Volume Down buttons simultaneously.
- Connect your device to the computer. Verify the connection by entering the command
fastboot devicesin your Command Prompt or Terminal. Your device should be listed. - Finally, flash the stock firmware using the command
fastboot flash rom [filename].img. Ensure the stock firmware file is in the same directory as the Fastboot tools.
For more detailed insights into the Fastboot process and its use as a firmware flashing tool, consider checking resources from reliable sources like Android Authority, which offer in-depth articles on stock firmware guides and flash ROM tutorials.
How to Use Odin to Flash Firmware on Samsung Devices
If you need to perform an Android firmware update on your Samsung device, Odin is one of the most reliable firmware flashing tools available. Here’s a step-by-step guide on how to use Odin to flash stock firmware, helping you unbrick an Android phone or restore Android firmware easily.
Before starting, ensure you have the necessary files, including Odin software, the correct firmware for your device, and Samsung USB drivers, which are crucial for recognizing the device. This is a critical step in any flash ROM tutorial.
- Download and Install Odin: Get the latest version of Odin from a trusted source and install it on your computer. You can find official Odin versions on recognized forums like XDA Developers.
- Enter Download Mode: Turn off your Samsung device. Hold down the Volume Down, Home, and Power buttons simultaneously until the download mode screen appears.
- Connect the Device: Use a USB cable to connect your phone to the computer. Odin should detect your device automatically.
- Load the Firmware: In Odin, click on the AP button and select the downloaded stock firmware file.
- Start Flashing: Once the firmware file is loaded, click the Start button in Odin. The flashing process will begin, and your Samsung device will reboot after completion.
For users uncertain about specific settings or if issues arise, consult detailed resources such as our Beginner’s Guide to Odin: Flash Samsung Firmware for additional support. This guide is part of understanding Odin as a professional and authorized servicing tool only.
For further insights, check external resources like Android Authority’s comprehensive guide on flashing Samsung firmware.
Troubleshooting Common Issues When Flashing Firmware
Flashing stock firmware on an Android device can sometimes be a challenging task, often leading to unforeseen issues. Below, we address some common problems encountered during this process and offer guidance on how to resolve them effectively. This section is integral for anyone following a stock firmware guide and facing obstacles.
Device Not Recognizing the Firmware
One frequent issue is the device not recognizing the firmware file. Ensure you have downloaded the correct firmware specific to your device model. Double-check the file’s format—usually, it should be in a .zip file when using Android stock recovery or a .tar file when using software like Odin. For professional servicing use, tools like the SP Flash Tool can be instrumental for MediaTek devices. Also, verify if your device is adequately charged and connected via a reliable USB cable.
Device Stuck in a Bootloop
If your device falls into a bootloop after flashing, do not panic. This is a common issue. First, try performing a factory reset from the custom recovery for Android. If you’re unsure how to do this, you can learn more from the bootloop troubleshooting guide on Bytefixes. Additionally, reconsider the compatibility of the firmware or opt to reinstall it.
Bricked Device
A bricked device can seem alarming, but there is hope. Often, using firmware flashing tools specific to your device’s brand can help in such scenarios. For professional use, Android Central provides insights into unbricking procedures. Be sure to follow detailed instructions and don’t rush through the flash ROM tutorial to avoid complications.
By understanding these common issues and applying informed strategies, you can navigate the complexities of updating your Android device firmware smoothly and efficiently. Remember, patience and diligence are key to successfully resolving such challenges.
Post-Flashing Checklist: What to Do After Installation
Successfully navigating a flash ROM tutorial and installing stock ROM on your Android device is just the beginning. To ensure everything is running smoothly post installation, it’s crucial to follow a comprehensive checklist that preps your phone for daily use. Here’s what you should do after flashing the stock firmware.
Verify the Installation
First, confirm the Android firmware update by checking the software version in your device settings. A mismatch may indicate an incomplete process, necessitating a retry with the right firmware flashing tools. A stable system is vital for a seamless user experience.
Reconfigure Device Settings
Post installation, reconfigure your settings as the factory reset may have altered them. Adjust Wi-Fi, notifications, and other settings to optimize your Android device’s functionality. Don’t forget to set up data privacy options and secure your device with a strong password.
Install Necessary Apps
- Begin re-installing essential apps from the Google Play Store.
- Check for updates to apps that may have had newer versions released.
- Reinstall any custom recovery for Android if needed for future tweaks.
Restore Data
If you’ve backed up your data, now’s the time to restore it. Restoring contacts, photos, and documents will ensure continuity. Need help with devices that won’t boot? Learn how to fix a phone stuck in a bootloop on our blog for more guidance.
Considerations for Future Updates
Keep your device updated to prevent vulnerabilities. Future stock firmware updates can enhance performance and security, critical for preventing the need to unbrick Android phones often.
For comprehensive understanding on the topic, refer to this guide by Android Authority for additional insights.
Frequently Asked Questions About Flashing Stock Firmware
What is stock firmware?
Stock firmware, also known as the official ROM or install stock ROM, is the pre-installed operating system that comes with your Android device. It’s developed by the manufacturer to offer optimized performance and reliability for that specific model. Flashing stock firmware is essential for users who want to perform an Android firmware update, restore Android firmware, or unbrick their Android phone after issues arise from custom modifications.
Why should I flash stock firmware on my Android device?
There are several reasons to flash stock firmware on your smartphone or tablet. It can help in restoring your device to a stable state after experiencing issues with a custom ROM. Flashing is also useful when you need to upgrade your Android device, resolve software issues, or fix problems like a phone stuck in a bootloop. For further insights on resolving bootloop issues, you can check our comprehensive guide on bootloop fixes.
What tools do I need for flashing stock firmware?
Flashing stock firmware typically requires specific firmware flashing tools tailored to your Device’s brand and model. Popular tools include Odin for Samsung devices and SP Flash Tool for MediaTek chips. For authorized servicing, tools like Google’s recovery software can be helpful. It’s crucial to ensure compatibility and understanding of these tools to avoid issues during the process.
Is it safe to flash stock firmware?
Flashing stock firmware is generally safe if conducted correctly, but it does carry risks. Ensuring you’re using the correct firmware compatible with your device model is crucial to avoid complications. Backup all important data as a precaution before starting the process. In some cases, custom recovery for Android may be recommended for advanced users experienced in the flash ROM tutorial process.